【UnityC#講座】オブジェクトを縦横規則正しく並べて生成、色を変える、子オブジェクトにして検索する

Unity2018.1.5f1
Windows10

縦横規則正しく/トップ

今回は以下のことをします。

・オブジェクトの生成を好きな数だけ縦横規則正しく並べ、幅や高さも調節できるようにする。
・生成するオブジェクトの色と透明度を変える。
・生成したオブジェクトの中からひとつ検索する。
・生成したオブジェクトを子オブジェクトにした上でひとつ検索する。

このようなことができると広いマップの目印などを気軽に作れるので便利です。

■CubeをPrefabにして規則正しく並んで出現させる
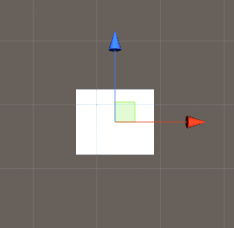
まずは空のオブジェクトを出しましょう。
これを置いた位置を中心にしてPrefabのオブジェクトが出現するようにします。

Hierarchy > Create > Create Empty

出てきたオブジェクトの名前を右クリック、Renameで名前を「Central」に変えます。

続いてCubeを出します。

Hierarchy > Create > 3D Object > Cube

これはHierarchyからProjectにドラッグ&ドロップしてPrefabにしてください。
Prefabとは大量生産するための型のようなものです。
Hierarchyに残ったCubeは削除して構いません。

次はスクリプトを書きます。

Project > Create > C# Script

名前は「LineUp」です。

using System.Collections;
using System.Collections.Generic;
using UnityEngine;
public class LineUp : MonoBehaviour
{
//高さ
public float high;
//オブジェクト間の幅
public float width;
//上から見て縦、Z軸のオブジェクトの量
public int vertical;
//上から見て横、X軸のオブジェクトの量
public int horizontal;
//Prefabを入れる欄を作る
public GameObject cube;
//位置を入れる変数
Vector3 pos;
void Start()
{
//このスクリプトを入れたオブジェクトの位置
pos = transform.position;
//Z軸にverticalの数だけ並べる
for (int vi = 0; vi < vertical; vi++)
{
//X軸にhorizontalの数だけ並べる
for (int hi = 0; hi < horizontal; hi++)
{
//PrefabのCubeを生成する
GameObject copy = Instantiate(cube,
//生成したものを配置する位置
new Vector3(
//X軸
pos.x + horizontal * width / 2 - hi * width - width / 2,
//Y軸
high,
//Z軸
pos.z + vertical * width / 2 - vi * width - width / 2
//Quaternion.identityは無回転を指定する
), Quaternion.identity);
}
}
}
}
view raw 08.cs hosted with ❤ by GitHub

for文は決められた数だけ処理し、その回数によって処理の結果を変えることができます。
このスクリプトではfor文を二重にし、縦の数だけ横のオブジェクト生成を位置を替えながらするようにしました。

X軸とZ軸の位置の計算が猥雑になっていますが、Centralの位置に縦/横の幅と出現するオブジェクトの数を掛け合わして半分にしたものを足すことでCentralが中央に来るようにしています。
さらにfor文の生成している回数と幅を掛け合わせたものを引くことで生成されたオブジェクトの位置を調整します。
それだけだとオブジェクトの位置が幅半分ほど多いのでその分を引いてできあがり、としました。

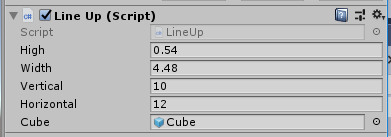
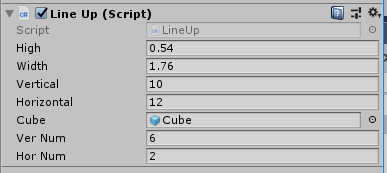
さてこのスクリプトをCentralにアタッチし、InspectorにCubeのPrefabをドラッグ&ドロップし、それぞれの数値を設定してください。
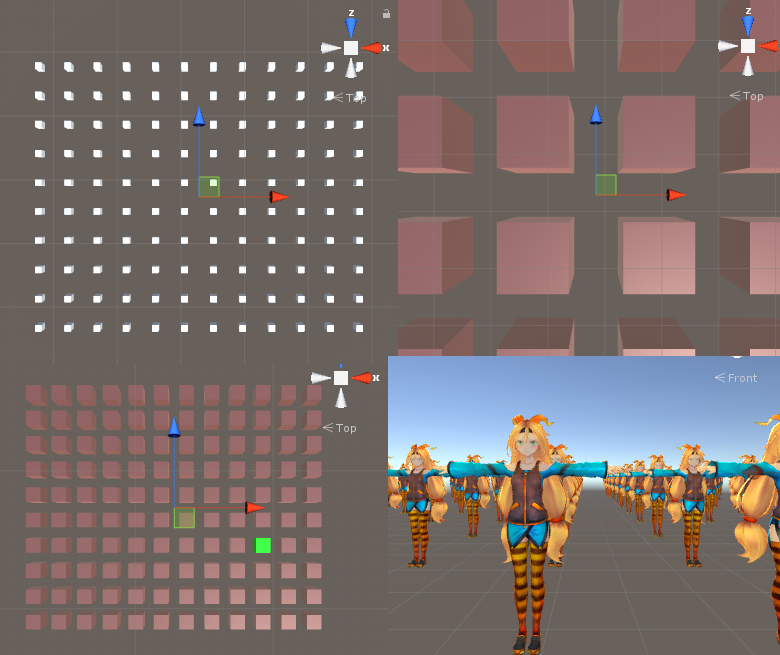
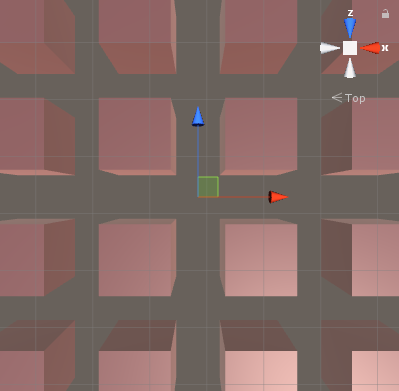
縦横規則正しく/LineUp/Inspector

さて、再生してみましょう。
ちゃんとCubeはきれいに並んで生成されているでしょうか?

縦横規則正しく/Cube/Prefab/縦横生成

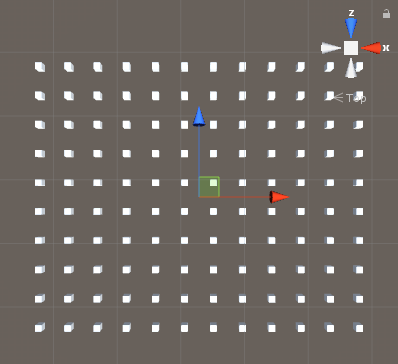
なお、オブジェクト自体の大きさは考慮していませんので幅がオブジェクトの大きさ以下だとこうなります。

縦横規則正しく/Cube/Prefab/縦横生成/隙間なし

セットするオブジェクトはユニティちゃんでもできます。

縦横規則正しく/ユニティちゃんClone

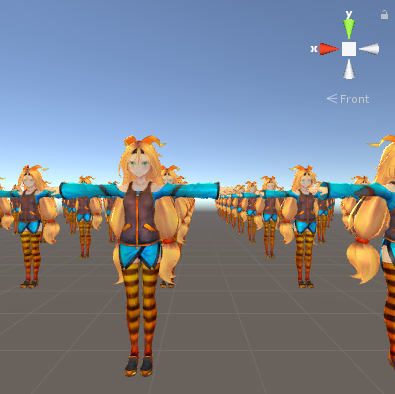
このユニティちゃんにアニメーションをつけるとこうなります。

縦横規則正しく/GIFアニメ/ユニティちゃん走る

すごい迫力ですね。

ユニティちゃんライセンス

この作品はユニティちゃんライセンス条項の元に提供されています

スポンサーリンク

■生成するオブジェクトの色を変える

さてユニティちゃんからCubeにセットし直してください。
次は生成するオブジェクトの色を変えてみましょう。
スクリプトに書き加えます。

using System.Collections;
using System.Collections.Generic;
using UnityEngine;
public class LineUp : MonoBehaviour
{
public float high;
public float width;
public int vertical;
public int horizontal;
public GameObject cube;
Vector3 pos;
//Materialを格納する変数
Material cMat;
void Start()
{
pos = transform.position;
for (int vi = 0; vi < vertical; vi++)
{
for (int hi = 0; hi < horizontal; hi++)
{
GameObject copy = Instantiate(cube,
new Vector3(
pos.x + horizontal * width / 2 - hi * width - width / 2,
high,
pos.z + vertical * width / 2 - vi * width - width / 2
), Quaternion.identity);
//生成したオブジェクトのRendererコンポーネントのMaterialを取得
cMat = copy.GetComponent<Renderer>().material;
//Materialの色を変える(赤、緑、青、透明度)
cMat.color = new Color(1.0f, 0.0f, 0.0f, 0.2f);
}
}
}
}
view raw 08a.cs hosted with ❤ by GitHub

生成したオブジェクトのMaterialにアクセスして色を変えます。
new Color(1.0f, 0.0f, 0.0f, 0.2f)の数字は左から赤,緑,青,透明度になっており0~1で設定します。
しかしPrefabのMaterialが最初からあるものだと透明度を変更できません
なのでMaterialを新たに設定して透明度を変えてみましょう。

Project > Create > Material

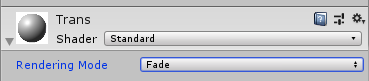
名前はTransparency(透明度)、略して「Trans」とでもしましょう。
これをCubeのPrefabにドラッグ&ドロップしてください。
そしてInspectorのTransのMaterialの左下の三角をクリックするとRendering Modeという部分が出てきます。
そこがOpaqueになっているのでFadeかTransparentにすると透明度を変えられます

縦横規則正しく/Material/Fade

さて無事にできたでしょうか。

縦横規則正しく/透明度

■オブジェクトを検索してひとつだけ色を変える

今度は生成したオブジェクトを検索してそれだけ色を変えてみましょう。
生成したオブジェクトはみな全て同じ名前です。

縦横規則正しく/Inspector/Clone

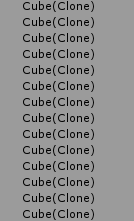
これだとひとつだけ検索できないのでそれぞれのオブジェクトに名前をつけ、その中から特定のものを選んで色を変えるようにします。

using System.Collections;
using System.Collections.Generic;
using UnityEngine;
public class LineUp : MonoBehaviour
{
public float high;
public float width;
public int vertical;
public int horizontal;
public GameObject cube;
Vector3 pos;
Material cMat;
//検索するオブジェクトの縦横の番号を決める
public int verNum;
public int horNum;
void Start()
{
pos = transform.position;
for (int vi = 0; vi < vertical; vi++)
{
for (int hi = 0; hi < horizontal; hi++)
{
GameObject copy = Instantiate(cube,
new Vector3(
pos.x + horizontal * width / 2 - hi * width - width / 2,
high,
pos.z + vertical * width / 2 - vi * width - width / 2
), Quaternion.identity);
cMat = copy.GetComponent<Renderer>().material;
cMat.color = new Color(1.0f, 0.0f, 0.0f, 0.2f);
//生成される順番にちなんだ番号がついた名前になる
//テキストは""で囲み、変数はそのままで良い
copy.name = "copy" + vi + "-" + hi;
}
}
//Hierarchyの中にあるオブジェクトの中から検索
GameObject only = GameObject.Find("copy" + verNum + "-" + horNum);
//検索されたオブジェクトのMaterialを取得
Material onlyMat = only.GetComponent<Renderer>().material;
//検索されたオブジェクトの色を変える
onlyMat.color = new Color(0.0f, 1.0f, 0.0f, 1f);
}
}
view raw 08b.cs hosted with ❤ by GitHub

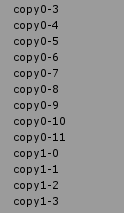
さて、InspectorのverNumとhorNumに番号を入れましょう。
名前につけられる数字は0から始まるので、それぞれverticalとhorizontalより小さな数字を入れなくてはいけません

縦横規則正しく/LineUp/Inspector/名前・検索の数字入力欄追加

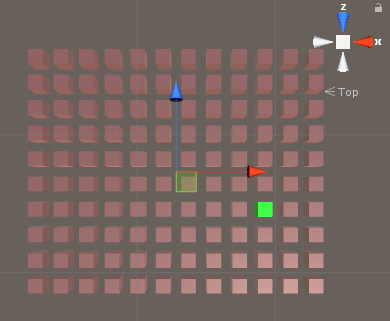
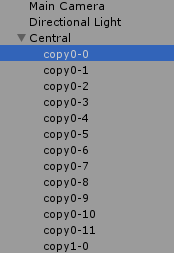
再生するとHierarchyに名前はこのように表示されます。

縦横規則正しく/Inspector/Cloneに固有の名前

そしてひとつだけ緑色になりました。

縦横規則正しく/ひとつだけ検索して色つける

■子オブジェクトにして検索する

さて次は生成したオブジェクトをCentralの子オブジェクトにして検索、そしてまたひとつだけ色を変えてみましょう。

using System.Collections;
using System.Collections.Generic;
using UnityEngine;
public class LineUp : MonoBehaviour
{
public float high;
public float width;
public int vertical;
public int horizontal;
public GameObject cube;
Vector3 pos;
Material cMat;
public int verNum;
public int horNum;
void Start()
{
pos = transform.position;
for (int vi = 0; vi < vertical; vi++)
{
for (int hi = 0; hi < horizontal; hi++)
{
GameObject copy = Instantiate(cube,
new Vector3(
pos.x + horizontal * width / 2 - hi * width - width / 2,
high,
pos.z + vertical * width / 2 - vi * width - width / 2
), Quaternion.identity);
cMat = copy.GetComponent<Renderer>().material;
cMat.color = new Color(1.0f, 0.0f, 0.0f, 0.2f);
copy.name = "copy" + vi + "-" + hi;
//これでCentralの子オブジェクトにする
copy.transform.parent = this.transform;
}
}
//GameObjectではなくTransformで検索する
Transform only = GameObject.Find("copy" + verNum + "-" + horNum).transform;
Material onlyMat = only.GetComponent<Renderer>().material;
onlyMat.color = new Color(0.0f, 1.0f, 0.0f, 1f);
}
}
view raw 08c.cs hosted with ❤ by GitHub

このようにCentralの子オブジェクトになりました。

縦横規則正しく/Inspector/Cloneを子オブジェクトに

先ほどと同じく色がひとつ変わっているはずですがちゃんとなったでしょうか?

これで今回は終わりです。
お疲れさまでした。

スポンサーリンク

目次に戻る